Oops! You Indexed Sensitive Data in Splunk
Every organization deals with sensitive data like Personally Identifiable Information (PII), Customer Information, Propriety Business Information…etc. It is important to protect the access to sensitive data in Splunk to avoid any unnecessary exposure of it. Splunk provides ways to anonymize sensitive information prior to indexing through manual configuration and pattern matching. This way data is accessible to its users without risking the exposure of sensitive information. However, even in the best managed environments, and those that already leverage this Splunk functionality, you might at one point discover that some sensitive data has been indexed in Splunk unknowingly. For instance, a customer facing application log file which is actively being monitored by Splunk may one day begin to contain sensitive information due to a new application feature or change in the application logging.
This post provides you with two options for handling sensitive data which has already been indexed in Splunk.
Option 1: Selectively delete events with sensitive data
The first, and simplest, option is to find the events with sensitive information and delete them. This is a suitable choice when you do not mind deleting the entire event from Splunk. Data is marked as deleted using the Splunk ‘delete’ command. Once the events are marked as deleted, they are not going to be searchable anymore.
As a pre-requisite, ensure that the account used for running the delete command has the ‘delete_by_keyword’ capability. By default, this capability is not provided to any user. Splunk has a default role ‘can_delete’ with this capability selected, you can add this role to a user or another role (based on your RBAC model) for enabling the access.
Steps:
- Stop the data feed so that it no longer sends the events with sensitive information.
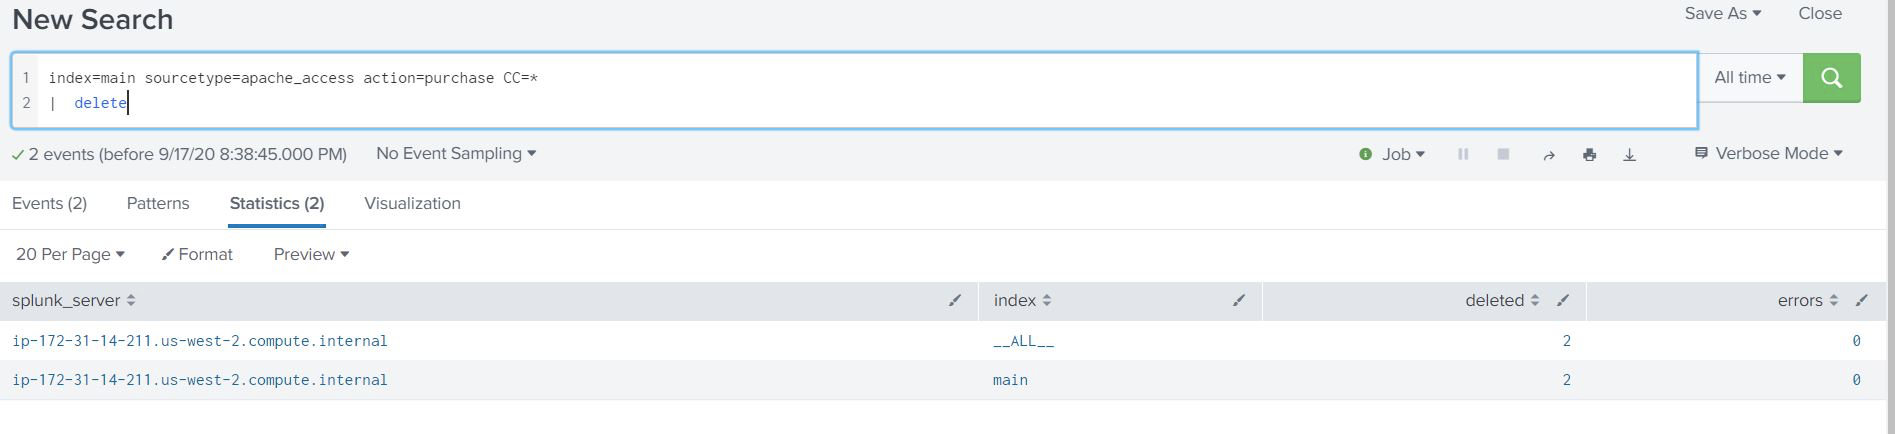
- Search for the events which need to be deleted.
- Confirm that the right events are showing up in the result. Pipe the results of the search to
deletecommand. - Verity that the events deleted are no longer searchable.
Note: The delete command does not remove the data from disk and reclaim the disk space, instead it hides the events from being searchable.
Option 2: Mask the sensitive data and retain the events
This option is suitable when you want to hide the sensitive information but do not want to delete the events. In this method we use rex command to replace the sensitive information in the events and write them to a different index.
The summary of steps in this method are as follows:
- Stop the data feed so that it no longer sends the events with sensitive information.
- Search for the intended data.
- Use rex in sed mode to substitute the sensitive information.
- Create a new index or use an existing index for masked data.
- With the collect command, save the results to a different index with same sourcetype name.
- Delete the original (unmasked) data using the steps listed in Option 1 above.
As mentioned in Option 1 above, ensure that the account has the ‘delete_by_keyword’ capability before proceeding with the final step of deleting the original data.
Let’s walk through this procedure using a fictitious situation. Let us take an example of an apache access log monitored by Splunk. Due to a misconfiguration in the application logging, the events of the log file started registering customer’s credit card information as part of the URI.
Steps:
- Disable the data feed which sends sensitive information.
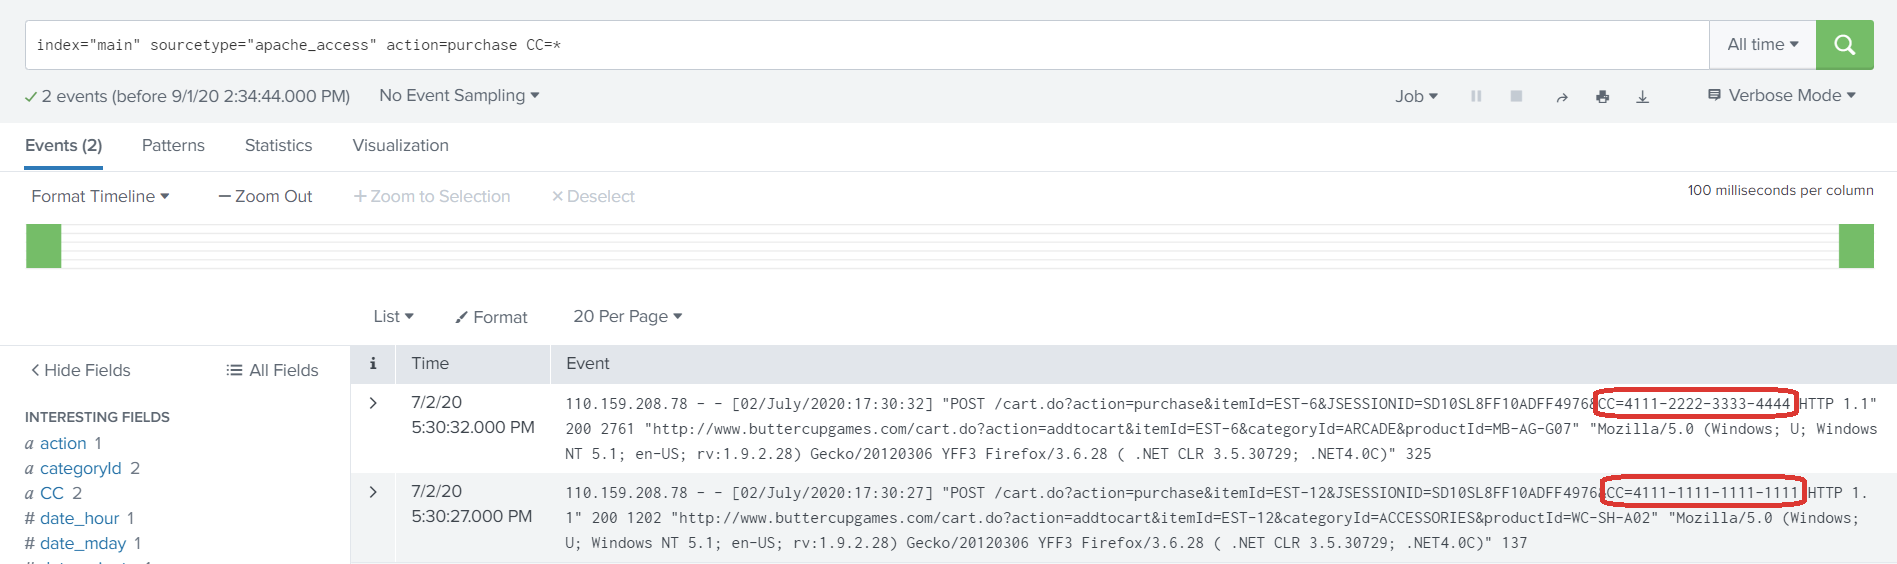
- Search for the events which contains the sensitive information. As you can see in the screenshot, the events have customer’s credit card information printed.
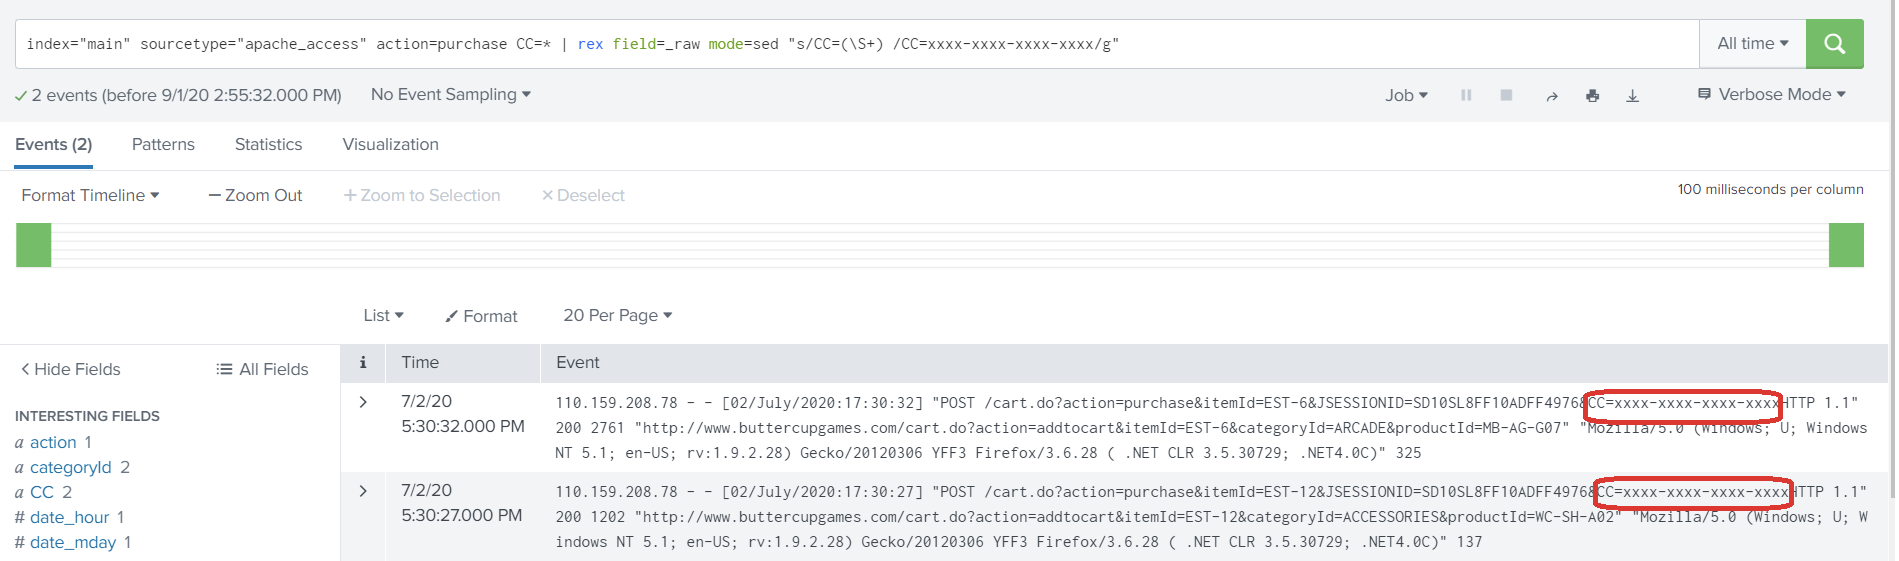
3. Use the rex command with ‘sed’ mode to mask the CC value at search time.
index="main" sourcetype="apache_access" action=purchase CC=*
| rex field=_raw mode=sed "s/CC=(\S+)/CC=xxxx-xxxx-xxxx-xxxx/g"
The highlighted regular expression matches the credit card number and replaces it with its new masked value of ‘xxxx’.
4. Verify that the sensitive information is replaced with the characters provided in rex command.
5. Pipe the results of the search to ‘collect’ command to send the masked data to a different index with same sourcetype.
index="main" sourcetype="apache_access" action=purchase CC=*| rex field=_raw mode=sed "s/CC=(\S+)/CC=xxxx-xxxx-xxxx-xxxx/g"| collect index=masked sourcetype=apache_access
6. Verify the masked data has been properly indexed using the collect command and is now searchable.
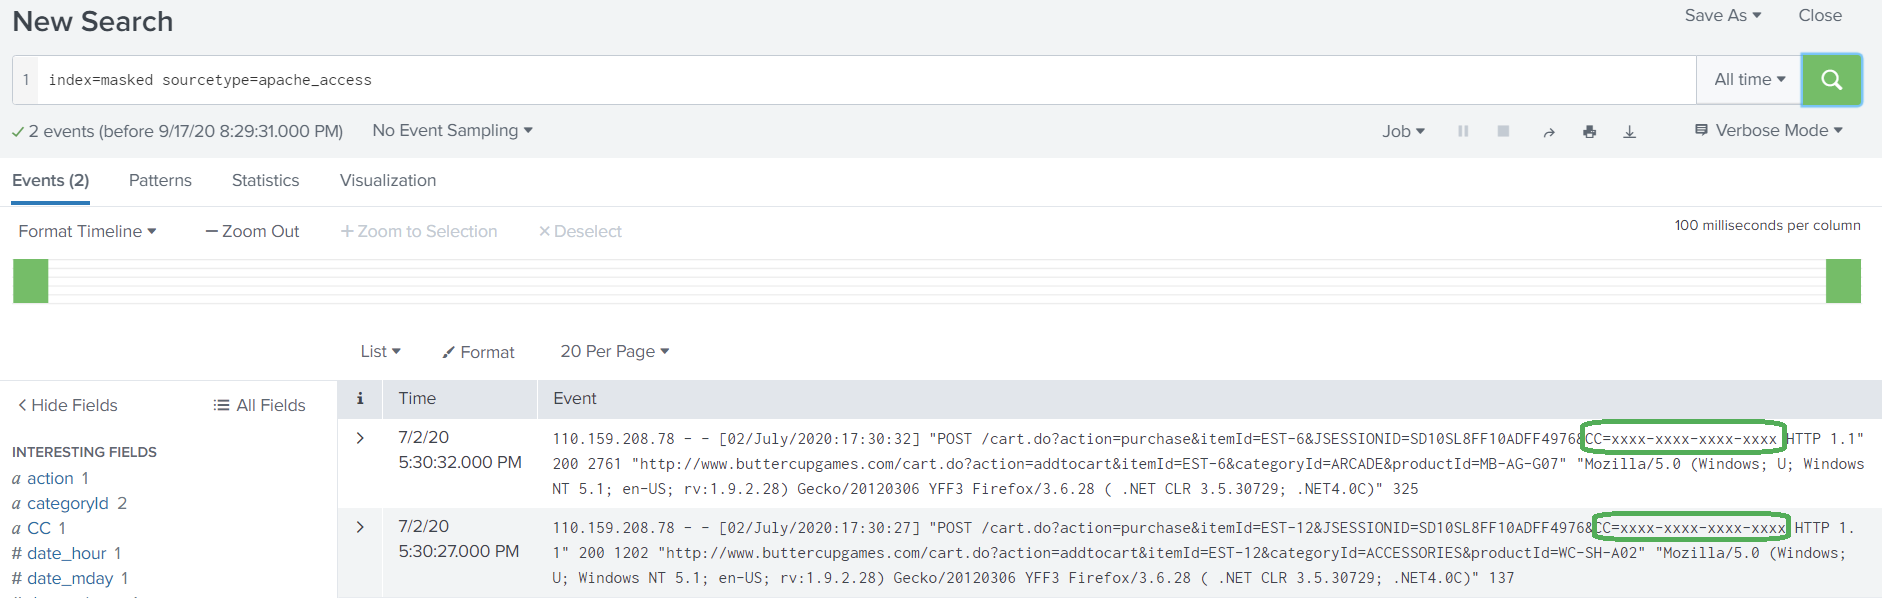
Note: Adjust the access control settings so that the users can access the masked data in the new/different index.
7. Once all events have been moved over to the new index, we need to delete the original data from the old index by running the delete command.
As mentioned earlier, ensure that you have capabilities to run ‘delete’ command.
8. Verify that data has been deleted by searching for it, as noted in Step 2 above.
9. Remove the ‘delete_by_keyword’ capability from the user/role now that the task is completed.
What Next?
Enable Masking at Index Time
It is always ideal to configure application logging in such a way that it does not log any sensitive information. However, there are exceptions where you cannot control that behavior. Splunk provides two ways to anonymize/mask the data before indexing it. Details regarding the methods available can be found within the Splunk documentation accessible through the URL below:
https://docs.splunk.com/Documentation/Splunk/latest/Data/Anonymizedata
Additionally, products such as Cribl LogStream (free up to 1TB/day ingest) provide a more complete, feature-rich, solution for masking data before indexing it in Splunk.
Audit Sensitive Data Access
Finally, if you have unintentionally indexed sensitive data before it was masked then it is always good to know if that data has been accessed during the time at which it was indexed. To audit if the data was accessed through Splunk, the following search can shed some light into just that. You can adjust the search to filter the results based on your needs by changing the filter_string text to the index, sourcetype, etc, which is associated with the sensitive data.
index=_audit action=search info=granted search=* NOT "search_id='scheduler" NOT "search='|history" NOT "user=splunk-system-user" NOT "search='typeahead" NOT "search='| metadata type=sourcetypes | search totalCount > 0"
| search search="*filter_string*"
| stats count by _time, user, search savedsearch_name
© Discovered Intelligence Inc., 2020. Unauthorised use and/or duplication of this material without express and written permission from this site’s owner is strictly prohibited. Excerpts and links may be used, provided that full and clear credit is given to Discovered Intelligence, with appropriate and specific direction (i.e. a linked URL) to this original content.